Taking care of your marine battery is essential for ensuring that your boat runs smoothly and efficiently. Neglecting your battery can lead to a host of problems, including poor performance, shorter lifespan, and even complete failure. With the right maintenance practices, however, you can keep your marine battery in good condition and avoid these issues altogether. Understanding Marine Battery Basics Marine batteries are essential components of any boat’s electrical system, providing power for everything from starting the engine to running electronics and appliances. Understanding the basics of marine batteries is crucial to keeping them in good condition and ensuring they perform optimally. Types of Marine Batteries There are several types of marine batteries available, each with its own advantages and disadvantages. The most common types are: Battery Capacity and Voltage Marine batteries are rated by their capacity, which is measured in amp-hours (Ah). This rating indicates how much current the battery can provide over a certain period. For example, a 100Ah battery can provide 5 amps of current for 20 hours or 10 amps of current for 10 hours. Marine batteries also have a voltage rating, which is typically 12 volts. However, some boats may have 24-volt systems that use two 12-volt batteries connected in series. Battery Maintenance Proper maintenance is essential for keeping marine batteries in good condition and prolonging their lifespan. Some basic maintenance tasks include: Choosing the Right Type of Marine Battery Selecting the correct type of marine battery is crucial for ensuring optimal performance of your boat’s electrical system. Here are some factors to consider when choosing a marine battery: Battery Type There are two main types of marine batteries: starting batteries and deep-cycle batteries. Starting batteries are designed to deliver short bursts of power to start the engine, while deep-cycle batteries are designed for slow discharge over an extended period. It is important to choose the right type of battery for the intended use. Battery Size The size of the battery required will depend on the electrical demands of the boat. The battery should be able to provide enough power to start the engine and run all the electrical equipment on board. It is important to choose a battery with the correct capacity to meet the boat’s needs. Battery Chemistry There are several types of battery chemistry available for marine batteries, including flooded lead-acid, sealed lead-acid, and lithium-ion. Each type has its own advantages and disadvantages. For example, flooded lead-acid batteries are less expensive but require more maintenance, while lithium-ion batteries are more expensive but require less maintenance and have a longer lifespan. Battery Brand Choosing a reputable brand of marine battery can help ensure reliability and performance. It is important to do research and read reviews before making a purchase to ensure the battery is of high quality. Battery Maintenance Proper maintenance is essential for maximizing the lifespan and performance of a marine battery. This includes regularly checking the battery’s charge level, cleaning the terminals, and storing the battery in a cool, dry place when not in use. By considering these factors when choosing a marine battery, boat owners can ensure optimal performance and reliability of their boat’s electrical system. Regular Inspection and Cleaning Regular inspection and cleaning of a marine battery are essential to ensure its longevity and proper functioning. This section will discuss two important sub-sections of regular inspection and cleaning: checking for corrosion and cleaning battery terminals. Checking for Corrosion Corrosion is a common problem in marine batteries, and it can reduce battery life and performance. It is caused by the reaction of the battery terminals with the air and moisture. Therefore, it is important to check for corrosion regularly and take necessary actions to prevent it. To check for corrosion, follow these steps: Cleaning Battery Terminals Cleaning the battery terminals is an important part of regular maintenance. Dirty terminals can cause poor performance and reduce battery life. Follow these steps to clean battery terminals: Regular inspection and cleaning of a marine battery can help prevent problems and ensure its longevity. Therefore, it is essential to check for corrosion and clean the battery terminals regularly. Proper Charging Techniques Avoiding Overcharging Overcharging is a common problem with marine batteries that can lead to reduced battery life and even permanent damage. To avoid overcharging, it is important to use a charger that is designed for marine batteries and to follow the manufacturer’s recommendations for charging time and voltage. It is also important to monitor the battery’s charge level during charging. Once the battery is fully charged, the charger should automatically switch to a maintenance mode to prevent overcharging. If the charger does not have a maintenance mode, it should be disconnected once the battery is fully charged. Maintaining Optimal Charge Level Maintaining the optimal charge level is crucial for the longevity of marine batteries. The battery should be charged after every use and allowed to receive a full charge. If the battery is not being used for an extended period of time, it should be stored in a climate-controlled environment above 32 degrees and below 80 degrees. To maintain the optimal charge level, the battery should be held at a considerably lower voltage once it is fully charged, typically 13.2 to 13.4 volts. Higher voltage levels will “gas” the battery and boil off electrolyte, which can shorten the battery life. Using a battery maintenance charger can help preserve the battery while in storage. It is also important to regularly check the battery’s charge level and recharge it as needed to maintain the optimal charge level. Storage and Handling Proper Battery Storage Proper storage is crucial for maintaining the health and longevity of your marine battery. Here are a few tips to keep in mind: Safe Battery Handling Handling a marine battery can be dangerous if you’re not careful. Here are a few safety tips to keep in mind: Periodic Battery Testing Periodic testing of your marine battery is crucial to ensure that it is functioning properly and to prevent any unexpected issues

The Pros and Cons of DIY Marine Battery Testing: A Clear and Neutral Examination
DIY marine battery testing can be a cost-effective way to maintain and troubleshoot a boat’s electrical system. However, it also comes with its own set of pros and cons. In this article, we will explore the advantages and disadvantages of DIY marine battery testing, so that boaters can make an informed decision about whether or not to take on this task themselves. Understanding Marine Battery Testing Marine batteries are essential for powering boats and other watercraft. However, they can fail at any time, leaving you stranded in the middle of the water. To avoid this situation, it is important to test your marine battery regularly. There are two ways to test a marine battery: DIY testing and professional testing. DIY testing involves using a multimeter or a load tester to check the battery’s voltage and capacity. Professional testing involves taking the battery to a certified marine technician who will perform a more comprehensive test. DIY marine battery testing has its pros and cons. On the one hand, it is relatively easy and inexpensive. You can do it yourself with a few basic tools and equipment. It also allows you to test your battery whenever you want, without having to wait for an appointment with a technician. On the other hand, DIY testing may not be as accurate or reliable as professional testing. If you are not familiar with the testing process, you may not be able to interpret the results correctly. This could lead to misdiagnosis and incorrect conclusions. In addition, DIY testing may not identify all the potential issues with your battery, which could lead to further problems down the line. When testing a marine battery, it is important to consider the following factors: Pros of DIY Marine Battery Testing Testing marine batteries is an essential task that should be done regularly to ensure they are working correctly. While some boat owners prefer to hire professionals to test their batteries, others choose to do it themselves. There are several pros of DIY marine battery testing, including cost efficiency, convenience, and knowledge acquisition. Cost Efficiency One of the most significant advantages of DIY marine battery testing is cost efficiency. Hiring a professional to test your battery can be expensive, especially if you need to do it frequently. By doing the testing yourself, you can save a lot of money in the long run. All you need is a digital voltmeter, which is relatively inexpensive and can be used for multiple tests. Convenience Another benefit of DIY marine battery testing is convenience. Boat owners can perform the tests at their convenience without having to wait for a professional to come and do it for them. This can be especially helpful for those who live in remote areas or have busy schedules. Additionally, DIY testing allows boat owners to perform tests anytime they suspect a problem, rather than waiting for a scheduled appointment. Knowledge Acquisition DIY marine battery testing can also help boat owners acquire more knowledge about their batteries and how they work. By performing the tests themselves, they can learn about the different components of their batteries and how they affect performance. This knowledge can be helpful in identifying potential issues and taking preventative measures to avoid future problems. Cons of DIY Marine Battery Testing Risk of Incorrect Results One of the biggest cons of DIY marine battery testing is the risk of obtaining incorrect results. If the testing is not done correctly, the results may not be accurate, leading to wrong conclusions. For instance, if the battery is not disconnected from the boat’s electrical system, the readings may be influenced by other factors, such as the alternator or other batteries. Similarly, if the testing equipment is not calibrated or used correctly, the results may be skewed, leading to incorrect diagnosis of the battery’s condition. Safety Concerns Another con of DIY marine battery testing is the potential safety hazards involved. Batteries contain acid and can produce explosive gases, which can be dangerous if not handled properly. If the battery is not disconnected correctly or the testing equipment is not used properly, it may lead to short circuits or other electrical hazards. Additionally, if the battery is damaged or leaking, it may pose a risk of chemical burns or other injuries. Time Consumption DIY marine battery testing can be time-consuming, especially if the boat owner is not familiar with the process or does not have the right equipment. Testing a battery requires disconnecting it from the boat’s electrical system, letting it rest for several hours, and then measuring its voltage and other parameters. If the battery needs to be recharged or replaced, it may take additional time and effort. Moreover, if the boat owner is not experienced in battery maintenance, they may spend more time troubleshooting or repairing the battery than a professional technician would. Comparing DIY to Professional Testing When it comes to testing marine batteries, there are two main options: DIY testing or professional testing. While DIY testing can be a cost-effective and convenient option, it may not always provide the most accurate results. Here are some pros and cons to consider when comparing DIY to professional testing: DIY Testing Pros Cons Professional Testing Pros Cons Conclusion In conclusion, DIY marine battery testing has both advantages and disadvantages. On the one hand, it can save boat owners time and money by allowing them to test their batteries at their convenience, without having to rely on a mechanic or technician. It can also help boat owners identify potential problems with their batteries before they become more serious and costly.
How to Interpret Marine Battery Test Results: Understanding the Numbers
Interpreting marine battery test results can be a daunting task for boat owners, especially those who are new to the world of boating. However, understanding what the numbers mean is crucial to ensuring that your boat’s battery is in good condition and working optimally. This article will provide a guide on how to interpret marine battery test results and what the numbers mean. Understanding Marine Battery Test Results When it comes to marine battery maintenance, understanding how to interpret the test results is crucial. The three most common tests are voltage readings, specific gravity readings, and load test readings. Each of these tests provides different information about the battery’s condition and can help you determine when it’s time to replace the battery. Voltage Readings The voltage reading is the simplest test to perform and provides a quick snapshot of the battery’s overall condition. A fully charged 12-volt battery should read around 12.6 volts. If the voltage reading is below 12.4 volts, the battery is likely discharged and needs to be recharged. If the voltage reading is consistently low, it may indicate a problem with the battery or the charging system. Specific Gravity Readings Specific gravity readings are used to determine the state of charge of each cell in a lead-acid battery. A fully charged cell should have a specific gravity reading of around 1.265. If the specific gravity reading is low, it may indicate that the cell is sulfated, which means that it has a buildup of lead sulfate on the plates. Sulfation can occur when the battery is not fully charged or is left discharged for an extended period. Load Test Readings Load test readings are used to determine the battery’s ability to deliver power under load. During a load test, a load is applied to the battery for a specified amount of time, and the voltage drop is measured. A healthy battery should be able to maintain a voltage of at least 9.6 volts during the load test. If the voltage drops below this level, it may indicate that the battery is weak and needs to be replaced. Interpreting Voltage Readings When testing a marine battery, one of the most important measurements to take is the voltage reading. Understanding what the voltage reading means can help you determine the state of charge of your battery, as well as if it is being undercharged or overcharged. State of Charge The state of charge refers to how much energy is left in the battery. A fully charged 12-volt marine battery should read around 12.6 volts. As the battery is used, the voltage will drop. The following table shows the approximate voltage readings for a 12-volt marine battery at different states of charge: State of Charge Voltage Reading 100% 12.6 volts 75% 12.4 volts 50% 12.2 volts 25% 12.0 volts 0% 11.8 volts If the voltage reading is significantly lower than what is expected for the state of charge, it may indicate that the battery is not holding a charge properly or that there is a problem with the charging system. Undercharging and Overcharging When a battery is undercharged, it means that it has not been fully charged and will not be able to provide its full capacity. This can lead to a shorter lifespan for the battery. If the voltage reading is consistently below the expected voltage for the state of charge, it may indicate that the battery is being undercharged. On the other hand, overcharging a battery can also cause damage. If the voltage reading is consistently above the expected voltage for the state of charge, it may indicate that the battery is being overcharged. Overcharging can lead to the battery overheating and can cause the electrolyte to boil, which can damage the battery. Deciphering Specific Gravity Readings When testing a marine battery, one of the most important parameters to measure is the specific gravity of the electrolyte solution. This measurement can provide valuable insights into the health of the battery and help diagnose any issues it may be experiencing. Here’s what you need to know to decipher specific gravity readings from your marine battery. Healthy Battery Indicators A healthy marine battery will typically have a specific gravity reading of around 1.265 to 1.275. This indicates that the battery is fully charged and has a high energy density. A specific gravity reading within this range is a good sign that the battery is in good condition and should be able to provide reliable power for your marine equipment. Signs of Battery Failure If the specific gravity reading of your marine battery is consistently below 1.225, this is a sign that the battery is experiencing significant issues and may be approaching the end of its useful life. A low specific gravity reading indicates that the battery is not holding a charge properly and may not be able to provide the power you need for your marine equipment. In addition to low specific gravity readings, other signs of battery failure may include: If you notice any of these symptoms, it’s important to have your battery tested and possibly replaced to ensure reliable performance on the water. Remember, specific gravity readings are just one part of a comprehensive marine battery test. It’s important to also check the voltage, load, and overall condition of the battery to get a complete picture of its health. By keeping a close eye on your marine battery’s specific gravity readings and other indicators, you can help ensure that your boat stays powered up and ready to go when you need it. Making Sense of Load Test Readings After performing a load test on a marine battery, the results can be confusing to interpret. However, understanding the readings is crucial to determine the battery’s health and whether it needs to be replaced. This section will explain how to interpret load test results and what the numbers mean. Acceptable Load Test Results A load test is considered acceptable if the battery maintains a voltage above 9.6 volts for

The Role of Wind Patterns in Sailing Regattas and Competitions: An Overview
Wind patterns play a crucial role in sailing regattas and competitions. Understanding the wind and atmospheric conditions in the race areas is fundamental for sailors to prepare the best race strategy and to achieve optimal performance. In fact, gaining knowledge on wind patterns is a key factor in sailing, as it can determine the outcome of a race. Understanding Wind Patterns Understanding wind patterns is crucial for sailors competing in regattas and competitions. Wind patterns are determined by the rotation of the Earth and the differences in air pressure between different regions. There are two main types of wind patterns that sailors need to understand: gradient wind and thermal breeze. Gradient Wind Gradient wind is the wind caused by systems in the atmosphere that is unimpeded by anything happening on the Earth’s surface. It is the most common type of wind pattern that sailors encounter. Gradient wind is affected by the Coriolis effect, which causes the wind to shift to the right in the Northern Hemisphere and to the left in the Southern Hemisphere. Sailors can determine the direction of the gradient wind by using a wind vane or compass. Wind speed can be measured in knots and is affected by the pressure gradient force, which is the difference in air pressure between two points. Thermal Breeze Thermal breeze is the wind caused by the heating and cooling of the Earth’s surface. It is a local wind pattern that sailors encounter near shorelines and in bays. Thermal breeze is affected by the temperature difference between the land and the water. Sailors can determine the direction of the thermal breeze by observing the movement of clouds and the temperature difference between the land and the water. Thermal breeze is usually weaker than gradient wind and can be affected by the wind shadow caused by nearby land masses. Understanding wind patterns is essential for sailors to make appropriate tactical decisions on the water. Sailors must learn how to read wind patterns and predict wind changes to improve their performance in regattas and competitions. The Impact of Wind on Sailing Wind is one of the most important factors that affect sailing. It determines the speed and direction of the boat, and it can also make sailing more challenging or easier depending on its strength and direction. In sailing competitions, wind patterns play a crucial role in determining the winner. The wind’s strength and direction can have a significant impact on the boat’s speed. When the wind is weak, the boat will move slower, and when it is strong, the boat will move faster. Wind direction also affects the boat’s speed. When the wind is coming from the side, the boat will move faster than when it is coming from the front or the back. In sailing competitions, the wind’s direction and strength are carefully monitored to ensure a fair competition. Sailors use wind maps and weather forecasts to plan their strategy and adjust their sails accordingly. They also need to be aware of sudden changes in wind direction and strength, which can significantly affect their performance. Wind strength and direction can also affect the boat’s stability. When the wind is strong, the boat can tilt or heel, making it more challenging to control. Sailors need to adjust their sails and weight distribution to maintain the boat’s balance and prevent capsizing. Wind Patterns in Regattas Understanding Regatta Wind Patterns Understanding wind patterns is essential for sailors who want to perform well in regattas. Wind patterns are determined by the interaction of various factors, including the topography of the area, the location of high and low-pressure systems, and the movement of air masses. In general, wind patterns in regattas are affected by the following factors: Adapting to Regatta Wind Patterns Sailors who want to perform well in regattas need to be able to adapt to changing wind patterns. Here are some tips for adapting to regatta wind patterns: Wind Patterns in Competitions Understanding Competition Wind Patterns In sailing competitions, wind patterns play a crucial role in determining the outcome of the race. Sailing teams must have a deep understanding of the wind patterns in the competition area to gain an advantage over their competitors. One important factor to consider is the local topography, which can significantly affect the wind patterns. For example, in the Sydney 2000 Olympics, the intricate topography of the area presented a challenge for wind forecasting. Spark et al. faced a similar problem in the wind forecasting for the sailing events at the Sydney 2000 Olympics. Another factor that affects wind patterns is the time of day. Diurnal patterns of wind speeds increasing and wind directions converging around 225-260 degrees towards the afternoon have been observed. Days with high-level winds from north of 260 degrees seem to produce more southerly surface winds in the afternoon compared to days with high-level winds blowing from south of 260 degrees. Adapting to Competition Wind Patterns Sailing teams must be able to adapt to the wind patterns in the competition area to perform well. One strategy is to develop a tool that provides strategical analysis, such as the “Call Book” developed by the Swedish Sailing Team for the Tokyo 2020 Olympics. The tool uses weather pattern recognition to predict wind fields, allowing the team to make informed decisions during the race. Another strategy is to observe the wind patterns during practice runs and adjust the sails and course accordingly. It is essential to be flexible and make quick decisions based on the changing wind patterns. Key Takeaways Wind patterns play a crucial role in determining the outcome of sailing competitions. Local topography and time of day significantly affect wind patterns. Sailing teams must adapt to the wind patterns in the competition area to perform well. Strategies include developing tools for weather pattern recognition and observing wind patterns during practice runs. Strategies for Managing Wind Patterns in Sailing Sailing competitions and regattas require expertise in managing wind patterns to gain an advantage over competitors. Here are
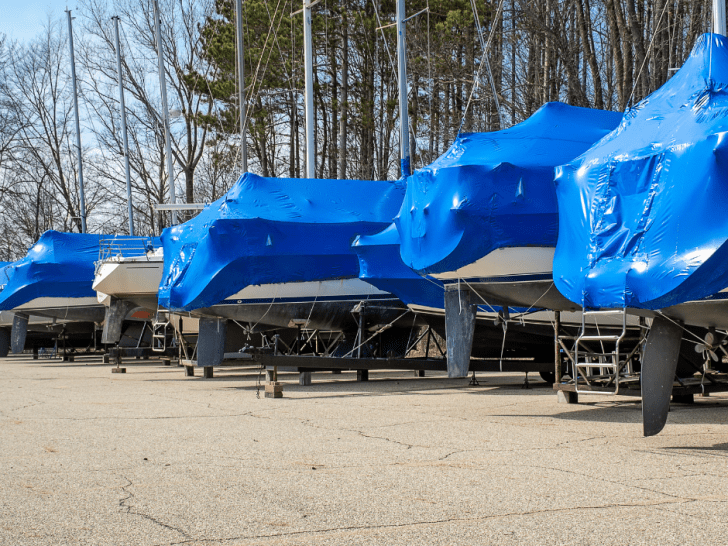
The Hidden Costs of Not Investing in Boat Shrink Wrap: Why It’s More Expensive in the Long Run
Boat shrink wrap is a protective covering that is used to shield boats from harsh weather conditions during the off-season. While some boat owners may consider shrink wrapping an optional expense, the truth is that not investing in it can lead to hidden costs in the long run. In this article, we will explore the various reasons why boat shrink wrap is a worthwhile investment and how it can help boat owners save money in the long term. The Importance of Boat Shrink Wrap Boat shrink wrap is an essential investment for boat owners who want to protect their vessel from the damaging effects of weather and other external factors. In this section, we will discuss the importance of boat shrink wrap and how it can prevent damage and save you money in the long run. Protection Against Weather Boats are exposed to a wide range of weather conditions, from extreme heat to freezing temperatures, rain, snow, and hail. Without proper protection, these weather conditions can cause significant damage to your boat’s exterior and interior. Boat shrink wrap provides an airtight seal that protects your boat from the elements and prevents water, snow, and debris from accumulating on the deck. Shrink wrap covers are very stable when built properly and can be customized every year depending on your needs and expectations. They are framed, supported, and tied to be very resistant to bad weather, rain, and snow. By investing in a quality boat shrink wrap, you can ensure that your boat is protected from the harsh effects of weather and that it remains in excellent condition for years to come. Prevents Damage Boat shrink wrap not only protects your boat from weather damage, but it also prevents damage caused by UV rays, animals, and other external factors. UV rays can cause your boat’s exterior to fade and dry out over time, which can be costly to repair. Animals such as birds and rodents can also cause significant damage to your boat’s interior and wiring, which can be expensive to repair. Shrink wrapping your boat provides a barrier that prevents these external factors from damaging your boat. It also helps to keep your boat clean and free from debris, which can save you time and money on cleaning and maintenance costs. The Hidden Costs of Not Investing Boat shrink wrap is an essential investment that can save boat owners a lot of money in the long run. However, not investing in boat shrink wrap can lead to several hidden costs that can quickly add up. In this section, we will explore some of the hidden costs of not investing in boat shrink wrap. Frequent Repair Expenses One of the most significant hidden costs of not investing in boat shrink wrap is the frequent repair expenses. Without proper protection, boats are susceptible to damage from the elements. The harsh sun, rain, and snow can cause significant damage to the boat’s exterior and interior, leading to costly repairs. For example, exposure to UV rays can cause the boat’s gel coat to fade, leading to the need for expensive repainting. Additionally, rain and snow can cause moisture damage to the boat’s interior, leading to mold and mildew growth, which can be expensive to remove. Decreased Boat Lifespan Another hidden cost of not investing in boat shrink wrap is the decreased lifespan of the boat. Without proper protection, boats are more likely to suffer from wear and tear, which can lead to a shorter lifespan. Exposure to the elements can cause significant damage to the boat’s exterior, leading to cracks, peeling, and other forms of damage. Additionally, moisture damage can cause wood rot, which can weaken the boat’s structure and lead to a shorter lifespan. Resale Value Reduction Finally, not investing in boat shrink wrap can lead to a reduction in the boat’s resale value. Boats that have been properly protected with shrink wrap are more likely to retain their value over time. On the other hand, boats that have been exposed to the elements are more likely to suffer from wear and tear, leading to a decrease in their resale value. Additionally, boats that have suffered from moisture damage are more likely to have mold and mildew growth, which can be a significant turn-off for potential buyers. Comparing Costs: Shrink Wrap Vs. No Shrink Wrap Initial Investment When it comes to protecting your boat, the initial investment in shrink wrap may seem daunting. However, it is important to consider the long-term costs of not investing in this protective measure. Without shrink wrap, your boat is exposed to the elements, which can lead to damage and deterioration over time. The cost of shrink wrap varies depending on the size of your boat and the type of material used. On average, the cost of shrink wrapping a boat ranges from $12 to $25 per foot. This may seem expensive, but it is important to consider the cost of repairs and maintenance that may be necessary without shrink wrap. Long-term Savings While the initial investment in shrink wrap may seem high, it can actually save you money in the long run. Without shrink wrap, your boat is exposed to the elements, which can lead to damage and deterioration over time. This can result in costly repairs and maintenance, as well as a shorter lifespan for your boat. Shrink wrap provides a protective barrier against the elements, helping to prevent damage and deterioration. This can result in fewer repairs and maintenance costs over time, as well as a longer lifespan for your boat. In addition, shrink wrap can also help to prevent theft and vandalism, which can result in even greater savings over time. Making the Wise Investment Choice Investing in quality shrink wrap for your boat is a wise decision that can save you money in the long run. Here are some tips for making the best investment choice: Choosing Quality Shrink Wrap When choosing shrink wrap for your boat, it is important to invest in

Boat Shrink Wrap vs Indoor Storage: Cost Comparison
Boat owners who live in areas with harsh winter weather must consider the best way to store their boats during the offseason. Two popular options are shrink wrapping and indoor storage. While both methods have their advantages, the cost is an important factor to consider when making a decision. Cost Comparison Boat Shrink Wrap Shrink wrapping a boat is a popular option for winter storage, but it can be expensive. The cost of shrink wrapping a boat will vary based on the length and dimensions of the boat. According to recent data, the cost of shrink wrapping a 20-foot boat ranges from $200 to $300. For larger boats, the cost can go up to $1,000 or more. In addition to the cost of the shrink wrap itself, there are other expenses to consider. Shrink wrapping involves a lot of different pieces, including the propane-fired heat gun necessary for providing the temperatures that make the polyethylene shrink to cling tightly to the boat. Some starter kits can easily cost $600 to $1,200, though it’s also possible to rent the gun for a week. Indoor Storage Indoor storage is another option for winter boat storage. The cost of indoor storage varies depending on the size of the boat and the location of the storage facility. For example, a 20-foot boat stored indoors for the winter could cost anywhere from $500 to $1,500, depending on the location and the services provided. One of the benefits of indoor storage is that it can provide better protection for your boat. Indoor storage facilities are typically climate-controlled, which means that your boat is protected from extreme temperatures, humidity, and other environmental factors that can cause damage. Additionally, many indoor storage facilities offer a range of services, including winterization, maintenance, and repairs. When considering the cost of indoor storage, it’s important to factor in the convenience and peace of mind that comes with knowing your boat is safe and secure. While indoor storage may be more expensive than shrink wrapping, it may be worth the cost for those who want to ensure their boat is protected from the elements and other potential hazards. Pros and Cons Boat Shrink Wrap Boat shrink wrap is a popular option for boat owners who need to store their boats during the off-season. Here are some pros and cons of using boat shrink wrap: Pros: Cons: Indoor Storage Indoor storage is another option for boat owners who want to protect their boats during the off-season. Here are some pros and cons of indoor storage: Pros: Cons: Considerations When deciding between boat shrink wrap and indoor storage, there are several factors to consider. Climate, boat size, and duration of storage are some of the most important considerations. Climate The climate in which the boat will be stored is a critical factor. Shrink wrapping is an excellent option for boats that will be stored in areas with extreme weather conditions, such as snow, ice, and freezing rain. Shrink wrapping provides a tight seal that protects the boat from the elements. However, if the boat will be stored in a mild climate, indoor storage may be a more cost-effective and practical option. Boat Size The size of the boat is another crucial factor to consider. Shrink wrapping can be expensive for larger boats, as it requires more material and labor. Indoor storage may be a more cost-effective option for larger boats, as it typically charges by the footage of the boat. However, smaller boats may be more affordable to shrink wrap. Duration of Storage The duration of storage is another critical factor to consider. If the boat will be stored for a short period, shrink wrapping may be a more practical option. Shrink wrapping is easy to install and remove, making it a flexible option for short-term storage. However, if the boat will be stored for an extended period, indoor storage may be a more cost-effective option. Indoor storage provides a secure and controlled environment that protects the boat from damage and theft. In conclusion, when deciding between boat shrink wrap and indoor storage, it is essential to consider climate, boat size, and duration of storage. Shrink wrapping is an excellent option for boats that will be stored in areas with extreme weather conditions, while indoor storage may be more cost-effective for larger boats and long-term storage.

Maintaining Your Pontoon Boat After a Party: Tips and Tricks
After a fun-filled party on your pontoon boat, the last thing you want to deal with is the aftermath of the mess. Cleaning and maintaining your pontoon boat after a party is essential to keep it in good condition and ready for the next adventure. Neglecting to clean up after a party can lead to stains, odors, and even damage to your boat. Cleaning Your Pontoon Boat After a Party Cleaning your pontoon boat after a party is crucial to maintain its appearance and functionality. Here are some steps to follow to ensure your boat is clean and ready for the next adventure. Gather Your Supplies Before starting, gather all the necessary supplies to make the cleaning process easier and more efficient. Here are some items to consider: Remove Trash and Debris Start by removing any trash and debris from the deck and upholstery. Use trash bags to collect all the garbage and dispose of it properly. Use a broom or vacuum to remove any loose debris. Clean the Deck and Upholstery Apply vinyl cleaner to the deck with a sponge or wash mitt, and scrub gently to remove any stains or dirt. Rinse the deck thoroughly with a pressure washer or garden hose to remove all soap and chemicals. Finally, dry the deck with a towel or chamois. For the upholstery, use a soft-bristle brush to remove any dirt or debris. Apply a vinyl cleaner and scrub gently. Rinse thoroughly with a pressure washer or garden hose and let it dry. Clean the Hull To clean the hull, use a fiberglass cleaner and a soft-bristle brush. Apply the cleaner and scrub gently. Rinse thoroughly with a pressure washer or garden hose and let it dry. Clean the Bimini Top To clean the bimini top, use a soft-bristle brush and a mild detergent. Scrub gently and rinse thoroughly with a pressure washer or garden hose. Let it dry completely before folding and storing. Clean the Carpet and Flooring For the carpet and flooring, use a carpet cleaner and a soft-bristle brush. Apply the cleaner and scrub gently. Rinse thoroughly with a pressure washer or garden hose and let it dry completely. Maintaining Your Pontoon Boat After a fun party on your pontoon boat, it’s important to properly maintain it to keep it in top shape. Here are some tips on how to maintain your pontoon boat: Rinse Your Boat After Every Use After each use, rinse the boat with fresh water to remove any salt, dirt, or debris. This helps prevent corrosion and damage to the boat’s exterior. Pay special attention to the pontoon tubes and undercarriage, as these areas are more susceptible to damage. Regularly Clean and Condition Upholstery and Carpet To keep your boat’s upholstery and carpet looking like new, regularly clean and condition them. Use a mild soap and water to clean the upholstery and carpet, and then apply a conditioner to protect them from UV rays and other environmental factors. Avoid using harsh chemicals or abrasive cleaners, as these can damage the upholstery and carpet. Check and Maintain Electrical Systems Regularly check and maintain your boat’s electrical systems, including the battery, wiring, and lights. Make sure the battery is fully charged and the wiring is in good condition. Check the lights to ensure they are working properly, and replace any bulbs that are burnt out. Check and Maintain Engine and Fuel Systems The engine and fuel systems are critical components of your pontoon boat. Regularly check and maintain these systems to ensure they are working properly. Check the oil and other fluids, and replace them as needed. Inspect the fuel lines and filters, and replace them if they are worn or damaged. Check and Maintain Trailer and Towing Equipment If you tow your pontoon boat, it’s important to regularly check and maintain the trailer and towing equipment. Inspect the tires, brakes, and lights on the trailer, and replace any worn or damaged components. Check the towing equipment to ensure it is in good condition, and replace any parts that are worn or damaged. By following these tips, you can keep your pontoon boat in great condition and ready for your next party on the water.

The Average Cost to Shrink Wrap a Boat
The cost of shrink wrapping a boat is a major concern for boat owners who want to protect their boats during the off-season. The cost of shrink wrapping varies depending on the size of the boat and the location of the boat. On average, the cost of shrink wrapping a boat ranges from $12 to $25 per foot. For sailboats, the cost of shrink wrapping is usually higher, ranging from $12 to $25 per foot. If the mast is left up, the cost may increase by $2 to $3 per foot. Optional wrapping features such as anti-moisture bags, an entrance, anti-mold spray, and vents for mold protection can also add to the cost. Professional boat shrink wrappers use the size of the boat to determine the final cost, and DIY shrink wrapping can save some money. Factors Affecting the Average Cost of Shrink Wrapping a Boat When it comes to shrink wrapping a boat, the cost can vary depending on several factors. Here are some of the main factors that can affect the average cost of shrink wrapping a boat. Boat Size The size of the boat is one of the most significant factors that can affect the cost of shrink wrapping. Generally, the larger the boat, the more it will cost to shrink wrap. The cost is usually calculated per foot of the boat’s length, so a 20-foot boat will cost less than a 30-foot boat. Boat Type The type of boat can also affect the cost of shrink wrapping. Powerboats and sailboats can have different shapes and structures, which can affect the amount of shrink wrap needed and the time it takes to wrap the boat. This can impact the cost of the service. Location The location of the boat can also affect the cost of shrink wrapping. If the boat is located in an area with a high cost of living, the cost of the service may be higher. Additionally, if the boat is located in a remote area, the cost of transportation and travel time for the service provider may be higher. Additional Services Additional services can also affect the cost of shrink wrapping a boat. For example, if the boat needs to be cleaned or prepped before shrink wrapping, this can add to the cost. Other optional services, such as anti-moisture bags, vents for mold protection, or adding an entrance, can also increase the cost. Average Cost of Shrink Wrapping a Boat Shrink wrapping is a popular method of winterizing boats. It involves wrapping a protective plastic cover around the boat to protect it from the elements. The cost of shrink wrapping a boat can vary depending on the size of the boat and the location of the boatyard. In general, the cost ranges from $12 to $25 per foot. Small Boats (20-30 feet) For small boats, the cost of shrink wrapping is on the lower end of the scale. On average, it can cost between $12 to $15 per foot. This means that a 20-foot boat can cost around $240 to $300 to shrink wrap. Medium Boats (30-40 feet) For medium-sized boats, the cost of shrink wrapping can increase slightly. On average, it can cost between $15 to $20 per foot. This means that a 30-foot boat can cost around $450 to $600 to shrink wrap. Large Boats (40-50 feet) For larger boats, the cost of shrink wrapping can increase significantly. On average, it can cost between $20 to $25 per foot. This means that a 40-foot boat can cost around $800 to $1,000 to shrink wrap. Extra-Large Boats (50+ feet) For extra-large boats, the cost of shrink wrapping can be even higher. The cost can vary depending on the size of the boat and the location of the boatyard. On average, it can cost between $25 to $30 per foot. This means that a 50-foot boat can cost around $1,250 to $1,500 to shrink wrap. It is important to note that these are just average costs for shrink wrapping a boat. The actual cost can vary depending on a variety of factors, including the size of the boat, the location of the boatyard, and any additional features that may be required. DIY vs. Professional Shrink Wrapping Shrink wrapping a boat can be a complicated process that requires specialized tools and skills. Boat owners have the option of either doing it themselves or hiring a professional to handle the task. In this section, we will explore the pros and cons of both DIY and professional shrink wrapping. DIY Shrink Wrapping Doing it yourself can be a cost-efficient option for boat owners who have experience with the process. However, it is crucial to have the necessary tools and skills to avoid damaging the boat. The cost of materials and equipment can vary based on the size of the boat and the quality of the materials used. Some benefits of DIY shrink wrapping include: On the other hand, some drawbacks of DIY shrink wrapping include: Professional Shrink Wrapping Hiring a professional to shrink wrap a boat is a convenient option for boat owners who do not have the time, skills, or equipment to do it themselves. Professional shrink wrapping services typically include a warranty and insurance coverage for any damages that may occur during the process. Some benefits of professional shrink wrapping include: However, some drawbacks of professional shrink wrapping include: Conclusion In conclusion, the cost of shrink wrapping a boat can vary depending on several factors, including the size of the boat, the type of boat, and the additional features required. The average cost per foot for shrink wrapping a boat is around $8 to $25, with sailboats costing slightly more if the mast is left raised.

Is Shrinkwrapping Your Boat Worth the Cost? A Comprehensive Analysis
Shrink wrapping a boat is a popular method of protecting it from harsh weather conditions during the off-season. However, it comes with a cost that begs the question, is it worth it? The answer to this question is not a straightforward one as it depends on various factors, including the size of the boat, the location, and the materials used. What is Shrinkwrapping? Shrink wrapping is a process of covering a boat with a plastic film for protection during the off-season or during transportation. It is a popular method of protecting boats from harsh weather conditions, dust, and debris. The plastic film is heated, which shrinks and forms a tight seal around the boat, protecting it from the elements. The Process of Shrinkwrapping The process of shrink wrapping involves several steps. First, the boat is cleaned and prepped for the shrink wrap. Any sharp edges or protrusions are covered with padding to prevent the plastic from tearing. Then, the plastic film is unrolled and cut to the appropriate size. The plastic is then draped over the boat, and the edges are pulled tight and secured to the boat with strapping tape. Next, a propane-powered heat gun is used to heat the plastic film. The heat causes the plastic to shrink and form a tight seal around the boat. The heat gun is moved over the entire surface of the plastic, ensuring that it is evenly heated and shrinks uniformly. Once the plastic has shrunk to the desired tightness, the excess plastic is trimmed away. Materials Used for Shrinkwrapping The materials used for shrink wrapping boats include plastic film, strapping tape, and a propane-powered heat gun. The plastic film used for shrink wrapping boats is typically made of polyethylene, which is a strong, durable material that can withstand harsh weather conditions. The plastic film comes in various thicknesses, ranging from 6 to 12 mils. Strapping tape is used to secure the edges of the plastic film to the boat. It is a strong, adhesive tape that can withstand the heat of the heat gun. The propane-powered heat gun is used to heat the plastic film and shrink it around the boat. Benefits of Shrinkwrapping Your Boat Shrinkwrapping your boat is a popular method of winterizing boats. It involves wrapping a plastic cover around the boat, which is then heated to create a tight, waterproof seal. While some boat owners may be hesitant to invest in shrinkwrapping, there are several benefits to this method of winterization. Protection from the Elements One of the primary benefits of shrinkwrapping your boat is that it provides protection from the elements. The plastic cover will keep rain, snow, and other forms of precipitation from getting inside the boat, which can cause damage to the interior. Additionally, shrinkwrapping can also protect the boat from UV rays, which can cause fading and other damage to the boat’s exterior. Long-Term Storage Benefits Another benefit of shrinkwrapping your boat is that it can help with long-term storage. If you plan on storing your boat for an extended period of time, shrinkwrapping can help protect it from dust, dirt, and other debris that can accumulate over time. Additionally, shrinkwrapping can also help prevent pests, such as rodents, from getting inside the boat and causing damage. Cost Savings While shrinkwrapping your boat does come with a cost, it can also lead to cost savings in the long run. By protecting your boat from the elements and pests, you can avoid costly repairs and maintenance down the line. Additionally, shrinkwrapping can also be more cost-effective than purchasing a permanent cover for your boat, especially if you don’t plan on owning the boat long enough to recoup the cost of a canvas cover. Potential Drawbacks of Shrinkwrapping While shrinkwrapping a boat has many benefits, there are also some potential drawbacks to consider. In this section, we will discuss two of the most significant concerns: environmental impact and potential damage to the boat. Environmental Concerns Shrinkwrapping a boat involves using a significant amount of plastic, which can have negative environmental consequences. While shrinkwrap is recyclable, it is not always easy to recycle, and many marinas do not have the facilities to handle it. As a result, it often ends up in landfills or even in the ocean, where it can harm marine life. Additionally, the propane heat guns used to shrink the wrap release greenhouse gases and other pollutants into the air. While this is not a significant concern for a single boat, it can add up over time, particularly in areas with high boat density. Potential Damage to the Boat Shrinkwrapping a boat can also potentially cause damage to the vessel if not done correctly. If the wrap is too tight or not properly ventilated, it can trap moisture inside, leading to mold and mildew growth. Additionally, if the wrap is not properly secured, it can come loose in high winds, potentially causing damage to the boat or nearby property. Another concern is that the heat used to shrink the wrap can damage certain materials, such as wood or fiberglass. It is essential to ensure that the heat gun is not too close to the boat and that the wrap is not left on for too long. Factors to Consider Before Shrinkwrapping Your Boat Before deciding to shrinkwrap your boat, there are several factors that you should consider. These factors include the size and shape of your boat, the climate and weather conditions in your area, the storage location and duration, and your budget. Boat Size and Shape The size and shape of your boat are important factors to consider before shrinkwrapping. Larger boats may require more material and labor, resulting in higher costs. Additionally, boats with unique shapes may require custom-fitted shrinkwrap, which can also increase costs. Climate and Weather Conditions The climate and weather conditions in your area can also impact the decision to shrinkwrap your boat. If you live in an area with harsh winters or frequent storms, shrinkwrapping can